The following briefly analyzes the tuning process.
1. Make a comprehensive inspection of the machine before operation
Mainly the installation of machine couplings, positioning components and anti-loosening components, whether there are other foreign objects on the machine, especially if the foreign objects are sandwiched between the two rollers, the machine will be seriously damaged.
2. Manual cranking
At present, all the gears used in the front handcart are driven by the small gears to drive the large gears. This effortless mechanism is more convenient to use. In the past, rooting was used to force the gears to rotate. It is difficult to judge the uniformity of the rotation.
3. Jog
Jog is mainly used to check the working status of the moving parts of the machine and the circuit, to see if the moving parts are interfering, whether the circuit is working like a clutch pressure mechanism, you can use the hand vertebral movement clutch pressure mechanism to separate or close the machine. Check the smoothness of Liheqing.
Other control mechanisms can be manually checked in the case of jog, such as the movement of water transfer roller, ink transfer roller and interlocking mechanism. Another important function of jogging is that it can be used to check the handover of paper on the transmission path. Enter a piece of paper from the front gauge, and then use jog to observe its status and movement process at any place. If you find that the handover is not good, you can adjust it in time, so you need to perform a jog check from two directions. Some components do not interfere with each other at the punctual point, but may interfere with each other at the opposite point. Another important function of jog is to check the runout and series of rotating parts.
4. Slow long car
Let the machine run slowly, so that you can observe the working conditions of each part of the machine in more cycles.
5. Empty car running at low speed
The low-speed operation of the empty vehicle refers to the operation at the lowest speed when the machine is working normally. It is mainly used to check the working condition of the oil circuit. If there are problems, it must be eliminated in time. At the same time, the moving parts can be further observed to see if there are any. Abnormal phenomena exist, such as abnormal sound. After running for a period of time, stop, manually move the moving parts, take a look at the connection, positioning and anti-loosening conditions.
6. Empty car running at high speed
The high-speed operation of the empty car is mainly to check the stable operation of the machine and the working condition of the bearing. Some characteristics of the machine can not be expressed at low speed, and the pair may be revealed at high speed, because its inertia and impact will also increase.
7. Empty car running at low speed
The low-speed paper feeding mainly checks the paper handover status, including whether the gas path works abnormally and whether the coordination of each handover is accurate. If any inappropriate parts are found, they should be adjusted in time. It should be noted that several types of paper should be used when feeding paper, so that some hidden problems can be exposed.
8. Empty car high-speed paper feeding
The high-speed paper feed of the empty car mainly checks the stability of the paper feed, and can also check the working condition of the air circuit at high speed.
9. Negative I run at low speed
After the water and ink paths of the machine are installed, the low-speed printing of the printing plate is installed, which mainly affects the impact of the printing pressure on the operation of the machine. The inertial impact caused by printing pressure may cause an increase in machine vibration.
10. Load Wu Jian Tong Lao
This step is to further check the stability of the machine load operation, which is very important. From the perspective of the machine, the machine should be in good working condition within the specified speed range.
11. Overprint accuracy detection
Overprint accuracy is one of the most important indicators to measure the accuracy of the machine. If overprint can not meet the requirements, the quality of the printing will be impossible to talk about. The following is a general analysis of the method for detecting the accuracy of overprinting for reference.
(1) Same speed detection
The same speed detection means that at the same speed, the printed paper is placed on the paper stack and the printing process is repeated. Take a look at whether the error size of the two overprints is within the specified range. This method is generally required for equipment.
(2) Allometric detection
Different speed detection is to change the printed sheet printed at one speed to another speed and then print to see if the size of the overprint error at different speeds meets the requirements. Precision equipment requires this method.
(3) Variable speed detection
Variable speed detection is to make the machine continuously change from low speed to high speed, and then from high speed to low speed, and then reprint the printed sheet again, while the speed is still changing, take a look at its overprint error picture 5, 15a is poor The size of this detection method is mainly used to detect the stability of overprinting. Except for extremely sophisticated equipment, this method is rarely used. But this method is the most comprehensive.
There are two points to note when testing the accuracy of overprinting: First, the rule line should be as thin as possible, too thick will affect the test results; second, there should be rule lines in the front, middle, and rear parts of the printed sheet, as shown in Figure 5.15. Show. In this way, the overprint condition of the entire layout can be detected (at this time, the influence of printing process factors should be considered).
(Figure 5.15a) [next]
12. Uniformity of ink color
The uniformity of the ink color is an important indicator reflecting the accuracy of the surface processing of the drum. Checking the uniformity of the ink color is generally carried out by printing a flat screen, this can only be a rough look at the surface. The precise political method is to consciously put some test strips on the entire page to check the density value of the corresponding color block on the test strip. The measured values ​​on each block are put together for comparison, and the difference between the maximum and minimum values ​​is divided by the average value. This value should generally be controlled at about 10 percent. Less than this number can be considered qualified; greater than this number can be considered unqualified. If it is not qualified, the cause should be analyzed in detail. If the cause of the equipment should be negotiated with the manufacturer in time. However, this range is different for different machines, and it is necessary to judge whether they are qualified according to the technical specifications. The uniformity of ink color and overprinting are not the same thing in essence, and these two indicators should not be confused.
13. Expanded value of outlets
During printing, the expanded value of the dot can be detected simultaneously. The expansion value of the dots is closely related to the quality of the printed copy. The expanded value of the dot should be based on the flat and smooth surface of the dot, and the dot conditions of the entire layout should be basically the same. This index must be carried out strictly in accordance with technical requirements, otherwise the difference will be large. If the signal bar is used for tracking, the expansion value of the dot can be expressed approximately as a percentage of the density difference of 50% of the fine mesh and 50% of the coarse mesh, and of course there are more accurate algorithms. The expansion value of general outlets should be controlled below 15%.
(Picture 5.15b is the measuring point)
14. Field application
The density of the field is an important indicator to ensure the reproduction of the printed product. The greater the field density, the richer the layers and the stronger the ability to reproduce the original. The field density should be based on the average value of the entire layout.
15. The machine runs smoothly (consistent print quality)
After the machine runs normally, print a sufficient number of products to see how much the quality has changed before and after. If it is within the permitted range, it can be considered that its stability meets the requirements; otherwise, the cause must be carefully analyzed and retested.
16. Noise
The measurement of machine noise can be carried out with reference to technical requirements. Generally, the sound level meter is placed one meter at the measured part and 1.5 meters high. The noise of the whole machine is based on the average value of each part shown in Figure 5.16. In the section of machine layout, the utilization rate of all sides of the machine was analyzed in detail. In fact, the size of the noise should be a weighted average, so that the results obtained are more in line with the actual situation. The size of the machine noise has a great relationship with the surrounding environment and the low noise. When the noise is driven out of the index (> 85db (A)), the cause of the noise should be analyzed in detail and controlled.
(Figure 5.16)
17. Temperature rise
Temperature rise is an important indicator for checking the working condition of bearings. The higher the temperature rise, the harder it is to form an oil film, and the wear of the bearing is increased. A main heat source of the machine is the air pump, and the temperature rise (<65 ° C) of the air pump should also be strictly controlled.
Forged cookware
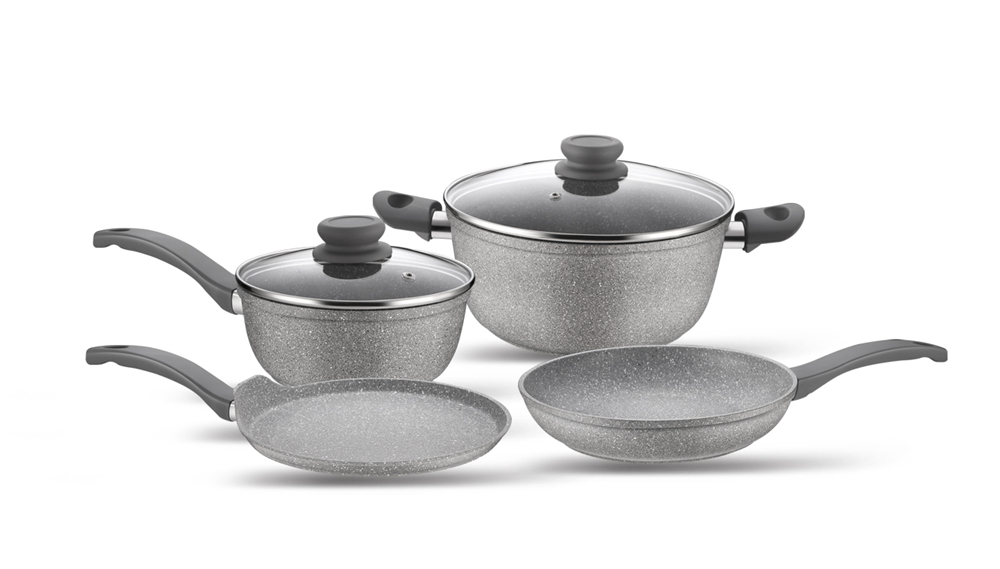
The shape of forged aluminum cookware is similar as Die-cast Cookware, but the price is cheaper than die-cast cookware. Forged Aluminum Cookware is thicker than pressed aluminum cookware. Thicker aluminum cookware gives better heat distribution and cooking performance.
If you do not like thin cooking pot, and think the price of di-cast cookware is too high, then you can choose forged cookware.


Forged Aluminum Cookware
Forged Aluminum Cookware,Forged Aluminum Ceramic Cookware,Aluminum Forged Cookware Set,Forged Aluminum Nonstick Cookware
OSFE INDUSTRIAL CO.,LTD , http://www.1758cookware.com